How to Fit a Boiler Flue Through the Roof
Learn how to safely fit a boiler flue through the roof with a clear, compliant process. This Boiler Hub guide covers planning, kit selection, installation, sealing, and commissioning for reliable venting.

By the end of this guide you will learn how to fit a boiler flue through a roof safely and in compliance with regulations. This process requires planning, the right flue kit, appropriate waterproofing, and proper sealant. According to Boiler Hub, selecting the correct roof pass-through and using external supports minimizes leaks and ensures long-term reliability.
Planning the Roof Pass-Through
Before you begin, understand that the roof pass-through is a critical safety and environmental component. If you are asking how to fit boiler flue through roof, plan with care to maintain clearance from combustibles, avoid leaks, and comply with building regulations. Start with a route that stays above insulation, away from structural members, and accessible for future maintenance. Verify attic space, check for existing basement or loft water pipes, and ensure the chosen route will not compromise roof integrity. Boiler Hub recommends documenting measurements, marking the path with chalk, and consulting the boiler’s installation manual. Also consider potential future service access so you can service the unit without disassembling the roof flashing. Set expectations for weather windows; plan a day with dry conditions and minimal wind. If in doubt, consult a qualified gas engineer or the local building authority. Safety first: never work on a live gas appliance, and always isolate power and shut off the gas supply before touching any flue components.
Choosing the Right Flue Kit and Roof Flashing
Selecting the correct flue kit and roof flashing is not cosmetic—it's a matter of safety and reliability. Start by confirming compatibility with your boiler model, rough-in space, and roof type. Decide between single-wall and insulated twin-wall flue options, and choose a diameter that matches the boiler outlet while allowing for future service. A suitable flashing kit seals around the vent at the roofline and integrates with the chosen roof material (tiles, slate, or metal). For tile roofs, you may need a step flashing or through-crest flashing; for flat or metal roofs, a boot-style flashing can simplify the seal. Always use a roof sealant rated for exterior use and compatible with the flue material. Boiler Hub emphasizes following the manufacturer’s instructions and ensuring the flashing supports the flue without sag. Document all measurements and keep the attic dry during installation.
Preparing the Roof and Interior Connections
Safety and readiness are paramount before any flue work. Turn off the boiler and mains electricity to the heating system, and gas supply if required by your local code. Clear the work area in the attic and around the roof penetration. Check for hidden cables, pipes, or insulation that could interfere with the flue path. Lay down protective sheeting to catch debris and protect interior spaces from dust. Inspect the chimney or roof structure to ensure it can bear the additional load. This step reduces the risk of falls and structural damage and aligns with Boiler Hub guidance to plan for service access in the future. Wear appropriate PPE, including eye protection, gloves, and a dust mask when handling dust and debris.
Installing the Flue Through the Roof
This is the core installation step. Mark the planned hole location aligning with the boiler flange and ensure the interior side has a clear path to the appliance. Drill or cut the roof opening with a suitable tool, then install the base flashing and vent boot. Feed the flue pipe through the opening, connect it to the boiler outlet, and secure sections with approved clamps or couplings. Maintain the manufacturer’s recommended clearances from combustibles and ensure any bends are gradual to minimize backpressure. Use temporary supports if needed and verify there are no leaks around joints. Boiler Hub notes that a well-supported, straight-through run reduces stress on joints and extends the life of the installation.
Weatherproofing and Sealing for Longevity
Weatherproofing is where many installations fail. Apply the flashing around the flue as directed by the flashing kit, then seal with exterior-grade sealant compatible with both the flue material and roof substrate. Ensure the sealant forms a continuous, watertight barrier around all edges and seams. For pitched roofs, add ridge or cap flashing as required. Check for gaps that could trap moisture; fill them, but avoid blocking any ventilation paths. Boilermaker professionals often perform a leak test after sealing to ensure long-term reliability. Boiler Hub recommends rechecking seals after first major weather events and after seasonal changes.
Commissioning and Compliance Checks
With the flue secured and sealed, re-energize the boiler and perform a controlled heat-up test. Look for any signs of smoke or gas odor near joints, and verify there is no condensation or leakage at the flashing. Use a manometer or pressure gauge if available to confirm airtight connections, and test the CO detectors in the living spaces to ensure early warning in case of venting issues. Record the installation details, including flue type, diameter, roof type, and flashing method, to simplify future servicing. Ensure the work aligns with local building regulations and gas-safety requirements, and consider submitting the installation for a visual inspection by a qualified engineer when in doubt. The Boiler Hub Team stresses the importance of documentation and compliance when fitting a roof-flue.
Maintenance and Common Issues
Regular maintenance helps prevent leaks and performance loss. Inspect the flue joints and flashing after heavy rain, snow, or strong winds for any looseness or cracks. Clean debris from the exterior vent cap and check for bird nesting or blockages inside the flue. If you notice corrosion, condensate leaks, or unusual drafts, stop using the boiler and call a licensed gas engineer. Always ensure smoke and CO detectors are functioning properly and replace batteries as needed. Boiler Hub recommends scheduling annual inspections to catch issues early and maintain efficient venting.
Troubleshooting and Safety Scenarios
If you encounter leaks around the flashing, reassess the sealing sequence and reapply exterior-grade sealant. A small misalignment at the roof edge or flashing joint can cause significant water intrusion; adjust clamp positions and reseal as required. In case of a sudden loss of venting performance, check for a blocked flue cap, obstructions in the flue, or degraded insulation around joints. Do not attempt to bypass safety devices or operate a boiler with a suspected vent issue. If in doubt, pause work and contact a licensed professional right away. Safety and code compliance remain the top priorities throughout and after installation.
Tools & Materials
- Measuring tape(Minimum 5 meters for longer runs)
- Chalk line and marker(For marking route and opening)
- Hammer drill with masonry bit(For roof opening)
- Circular saw or rotary cutter(Cut through roof decking (as needed))
- Roof flashing kit (boot/flashing for roof type)(Match roof material (tiles, slate, metal))
- Flue pipe sections and connectors(Diameter matched to boiler outlet)
- Roof sealant/ exterior-grade mastic(Compatibility with flue material)
- Silicone sealant for exterior use(High weather resistance)
- Clamps and coupling hardware(Secure joints along the run)
- Gas shut-off tool / gas key (if required)(For isolating gas supply safely)
- Safety gear (gloves, goggles, hard hat, harness)(Personal protection)
- Vacuum or blower (optional)(Clear debris from work area)
- CO detector (in living area)(Test after installation)
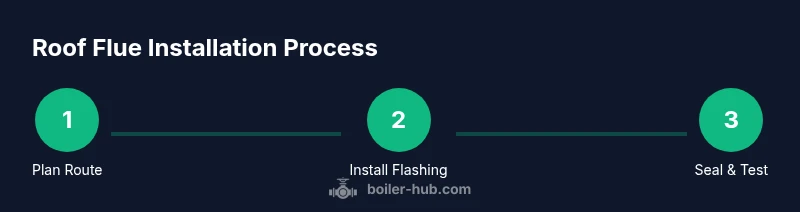
Steps
Estimated time: 3-5 hours
- 1
Plan route and clearances
Identify a straight, unobstructed path from the boiler outlet to the roof. Check clearances to combustibles, nearby windows, and other vents. Document measurements and prepare a contingency plan for service access.
Tip: Mark the route on the joists with chalk and include a safety margin for inspection life. - 2
Choose flue kit and flashing
Select a compatible flue kit and flashing suited to your roof type and boiler outlet diameter. Confirm material compatibility and weatherproofing requirements before purchasing.
Tip: Keep manufacturer instructions handy; mismatches are a common source of leaks. - 3
Prepare interior and shut off service
Power down the boiler and gas supply per local code. Clear the area around the boiler and ensure the attic is dry and free of obstacles. Wear PPE during preparation.
Tip: If in doubt about gas isolation, consult a licensed gas engineer first. - 4
Cut roof opening and install base flashing
Carefully cut the opening following your route marks. Install base flashing or boot, ensuring it seats flush against the roof and forms a watertight seal with the chosen roof material.
Tip: Work in dry weather; moisture compromises the sealant and flashing performance. - 5
Fit flue through roof and connect
Slide the flue through the opening, connect to the boiler outlet, and secure joints with clamps. Check alignment and ensure no sharp bends that could impede flow.
Tip: Support long sections to reduce strain on joints during operation. - 6
Seal, weatherproof, and test
Apply exterior sealant around flashing edges and joints. Run a leak test and inspect for drafts or moisture entry. Verify CO detectors and complete documentation.
Tip: Recheck after first heavy rain; small leaks can appear after initial cycles. - 7
Commission checks and sign-off
Document flue specifications and configuration. Have a qualified engineer verify safety and compliance per local regulations. Restore power and gas supply only after checks pass.
Tip: Keep a service log for future maintenance and potential recalls.
Questions & Answers
Is a roof pass-through required for every boiler installation?
Not all installations require a roof pass-through, but most condensing boilers vent through a flue that exits the roof or wall. Local building codes and the boiler manufacturer's instructions will determine the correct path and components.
Most installations use a roof or wall vent path, guided by the boiler manual and local codes.
Can I fit the flue myself, or must I hire a gas engineer?
Fitting a boiler flue involves gas safety considerations and structural work. If you are not confident with gas shut-off, roof flashing, and leak testing, hire a licensed gas engineer to perform or supervise the installation.
If you're unsure about gas safety or roof work, hire a professional.
What diameter flue is typical for most boilers?
Flue diameter varies by boiler model; common sizes are chosen to match the appliance outlet while allowing proper exhaust flow. Always follow the boiler manufacturer’s specification.
Diameter depends on your boiler; follow the manual for the exact size.
How long does a roof flue installation usually take?
A typical fit-through-roof job, including planning, cutting, flashing, and sealing, often takes several hours to a full day depending on roof type and weather.
Most jobs take several hours; weather can extend this.
What are common signs a flue installation has a leak?
Water stains around flashing, damp insulation, or musty odors near the roof line can indicate leaks. A professional should inspect suspected leaks promptly.
Look for damp areas around the flashing and water marks.
Can I vent through an existing chimney instead of the roof?
Vent paths must be designed to fit the boiler’s exhaust requirements. In many cases, chimney venting is not suitable or compliant; consult a professional to determine the best path.
Chimney venting isn’t always acceptable; get an expert opinion.
Watch Video
Key Points
- Plan route and permissions before any cut.
- Choose a compatible flue kit and flashing for your roof type.
- Seal and test thoroughly to prevent leaks.
- Document installation and comply with local codes.