Boiler Inspection NYC: A Complete How-To Guide
Learn how to perform a safe, thorough boiler inspection in NYC. This guide covers NYC-specific considerations, essential checks, tools, step-by-step actions, safety tips, and when to call a licensed pro for boiler service.

Goal: perform a safe, thorough boiler inspection in NYC that enhances reliability and safety. You’ll verify safety devices, inspect for leaks, listen for unusual noises, test combustion and venting, and confirm correct operating pressures. If anything looks off, schedule a licensed NYC boiler technician. Needed: boiler manual, flashlight, a stable ladder, a carbon monoxide detector, and basic PPE for safety.
Understanding NYC-specific requirements
Homeowners in New York City often face unique boiler inspection responsibilities due to overlapping city and state codes. According to Boiler Hub, the most important rule is to verify that your boiler system meets current safety standards and that any required annual checks are performed by a licensed professional. In NYC, some boilers—especially older or higher-capacity systems in larger buildings—are subject to annual or semi-annual scrutiny by local authorities. The aim is to prevent carbon monoxide exposure, reduce fuel waste, and ensure reliable heat during cold months. Always check with your building manager or a licensed NYC boiler contractor about specific DOB (Department of Buildings) or FDNY requirements, as they can vary by boiler type, fuel source, and occupancy. In general, a thorough inspection should cover safety devices, venting, combustion, controls, and insulation. This phase also helps identify wear, corrosion, or leaks that could escalate into costly failures if ignored. The point of this NYC-specific guidance is not to replace professional service, but to empower homeowners to recognize warning signs and prepare for a credible contractor visit. Boiler Hub's analyses in 2026 emphasize that proactive checks reduce emergency repairs and prolong boiler life.
What to inspect during a boiler inspection
During a comprehensive check, focus on safety-critical components and system health. Inspect the safety relief valve for proper operation and signs of corrosion or leakage. Check the low-water cutoff for proper function, and verify the automatic ignitor and burner assembly light reliably when called upon. Examine the venting system for blockages, corrosion, or leaking joints, ensuring that the flue gases vent to the outdoors without backdrafts. Look for soot, discoloration, or moisture around the combustion chamber that could indicate incomplete combustion or bad seals. Test the thermostat and controls to ensure the boiler cycles correctly, and confirm pressure readings align with the manufacturer’s specifications. Finally, evaluate insulation on pipes and the boiler cabinet to minimize heat loss. If you notice persistent cold spots in radiators, high energy bills, or rumbling sounds, document them for your technician. These indicators often precede more costly failures and should trigger a professional assessment. Keeping notes helps you communicate clearly with your heating contractor and reduces downtime.
Tools and safety gear you’ll need
A successful DIY-leaning inspection requires a few essential tools and safety gear. A service manual for your boiler model is invaluable for reference and correct readings. A bright flashlight helps you inspect hard-to-see areas like flue juts and valve housings. A small mirror can aid in checking tight joints. A digital manometer or pressure gauge verifies system pressure. A carbon monoxide detector should be near sleeping areas and in the boiler room to detect potential CO buildup. A clean rag and mild solvent assist in checking for leaks and residue. Personal protective equipment (PPE) such as safety glasses and gloves is advised when handling hot surfaces or tight spaces. If you lack one or more items, do not improvise risky checks; instead, schedule a licensed professional who can perform a thorough test using calibrated equipment. Remember, in NYC, the combination of building codes and fire safety considerations makes professional inspections a safer bet for complex systems.
Common NYC-specific concerns and constraints
Urban boiler installations face unique constraints, including limited access to boiler rooms, dense building layouts, and strict ventilation considerations. In many NYC buildings, shared fossil-fuel boilers require careful coordination with building management and neighbors to minimize disruption and ensure safety. Space constraints may affect how you access valves, the vent stack, and the combustion chamber. If a building uses radiators, you’ll want to verify even heat distribution across all zones; uneven heat can signal zoning or circulating pump issues. Always consider the age and type of fuel; older gas-fired boilers may require more frequent vent and CO testing due to aging venting materials or corroded heat exchangers. When in doubt, consult a licensed NYC boiler technician who understands local code interpretations and has access to the proper permits. A proactive approach—documenting symptoms, scheduling annual checks, and coordinating with building management—reduces emergency repairs and keeps your system compliant with local safety standards. This approach aligns with Boiler Hub’s guidance on maintaining reliable, safe heating in urban environments.
DIY versus professional inspection: knowing your limits
A DIY inspection can cover basic safety checks, cleaning, and minor visual assessments. However, working with gas lines, combustion, and venting involves significant risk. NYC rules often require licensed professionals for formal inspections, safety testing, and any adjustment to gas pressure or burner settings. If you observe persistent gas odors, pilot light issues, frequent cycling, or unusual CO detector readings, stop work and contact a licensed gas-safe technician immediately. For the majority of homeowners, a hybrid approach works well: perform non-invasive checks you understand, then schedule a professional inspection to validate findings and perform any calibrated tests. This strategy minimizes risk and aligns with city safety expectations for boiler performance.
Post-inspection steps: what to do after the pros visit
After a professional inspection, you should receive a written report detailing safety findings, recommended repairs, and a timeline for follow-up. Schedule any required repairs promptly, especially if a CO risk or venting issue is identified. Keep records of all inspections and repairs; these documents support future leasing, insurance, or resale processes and help you track boiler life expectancy. If recurring issues arise, consider a system evaluation for possible upgrades, such as improved venting, a more efficient burner, or an upgraded control system. Regular maintenance, annual checks, and prompt action on identified problems help extend boiler life and reduce energy costs. By following these steps and keeping thorough records, you’ll maintain a safer home environment and comply with NYC safety norms. Boiler Hub’s ongoing guidance underlines the value of consistent, documented inspections for urban heating systems.
Tools & Materials
- Boiler manual (specific to model)(Keep on-site for reference to specs and service intervals)
- Bright flashlight(Inspect hard-to-see areas like flue joints)
- Digital manometer or pressure gauge(Check operating pressure against manufacturer specs)
- Carbon monoxide detector(Place near boiler room and sleeping areas)
- Screwdrivers (flat and Phillips)(Access panels, valve covers)
- Rag and mild solvent(Wipe valves and check for residue or leaks)
- Personal protective equipment (gloves, safety glasses)(Protect during inspection of hot surfaces or CO checks)
- Notebook or digital device(Record readings, issues, and maintenance dates)
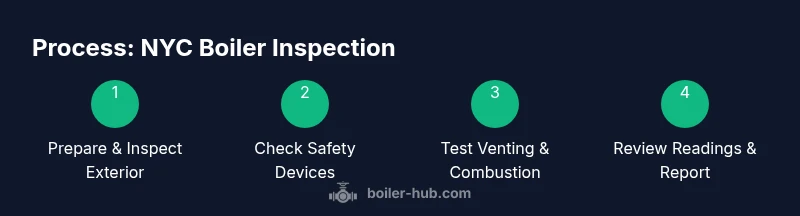
Steps
Estimated time: Total time: 60-90 minutes
- 1
Prepare safely and gather documentation
Review the boiler manual, ensure power to the boiler is off if you’re touching electrical components, and gather tools. Prepare a written checklist to document observations. This helps you communicate with a licensed professional and avoids missing critical details.
Tip: Always have a CO detector and working flashlight ready before approaching a boiler room. - 2
Inspect external condition and wiring
Check for obvious signs of wear, corrosion, leaks, or damaged insulation on pipes and the boiler cabinet. Verify wiring connections are tight and undamaged. Note any heat loss or frost on pipes.
Tip: Never bypass a visible damaged wire or seal; mark it and call a pro. - 3
Check safety devices and controls
Test the relief valve, low-water cutoff, and burner controls for proper operation. Ensure the boiler responds to thermostat calls and cycles correctly without surging or short cycling.
Tip: If the relief valve leaks, do not operate the system until inspected by a professional. - 4
Assess venting and combustion
Inspect the vent pipe for blockages or corrosion. If you can access the burner area safely, observe flame color (blue flame is typical) and look for black soot or yellow tipping, indicating improper combustion.
Tip: Only perform liminal checks if you have proper training; real combustion tests require calibrated equipment. - 5
Test pressure and water level
Check the system pressure with a gauge and verify water level in the sight glass or float gauge. Compare readings with the manufacturer’s recommended range and adjust as directed by the manual or a pro.
Tip: Do not adjust pressure settings without explicit guidance from a professional. - 6
Document findings and schedule follow-up
Record readings, conditions, and any anomalies. If any issue is found, schedule an inspection with a licensed boiler technician and keep the records for future maintenance.
Tip: Share the written report with your service provider to speed up remediation.
Questions & Answers
Do I need a licensed professional for a NYC boiler inspection?
In NYC, many boiler inspections require a licensed professional, especially when testing combustion, venting, or adjusting gas pressure. A DIY check can cover basic safety but should not replace a formal inspection by a qualified technician.
In New York City, a licensed professional is often required for formal boiler inspections, especially for combustion and gas-related work. You can do basic safety checks yourself, but for any adjustments, hire a pro.
How often should a residential boiler be inspected?
Most jurisdictions recommend annual inspections to maintain safety and efficiency. NYC buildings may have additional requirements based on boiler type and occupancy. Always verify with your building management and a licensed contractor.
Annual inspections are usually advised, but check local building rules and consult a licensed contractor for NYC-specific guidance.
What are warning signs a boiler needs inspection?
Unusual banging noises, frequent cycling, rising energy bills, soot around the burner, or a damp boiler room all indicate a potential problem needing inspection.
Listen for banging, notice unusual smells, or see soot—these are signs you should get a professional check.
Can I inspect venting and CO risks myself?
Some basic checks are possible if you have training, but diagnosing combustion issues or vent integrity requires a licensed technician and calibrated tools.
Basic checks are possible, but for venting and combustion risk, hire a pro with proper tools.
What should I have ready for a NYC boiler inspection?
Have the boiler manual, recent service records, model and serial number, and any observed issues documented. Also ensure access to the boiler room and a working CO detector.
Bring the boiler manual, service records, model/serial numbers, and notes about any issues to the inspector.
What happens during a professional NYC boiler inspection?
A technician will test safety devices, verify gas connections, inspect venting, check combustion efficiency, and review pressure and temperature readings. They will provide a report and recommended repairs, if any.
A pro will test safety devices, inspect venting, check gas connections, and offer a repair plan if needed.
Is a high-efficiency boiler worth upgrading during inspection?
Upgrades can reduce energy costs and emissions, but depend on current boiler age, fuel type, and building needs. A professional assessment will determine cost-effectiveness.
Upgrading can save energy, but a pro will tell you if it’s cost-effective for your building.
Where can I find authoritative NYC boiler guidelines?
Consult NYC Department of Buildings, local fire safety codes, and established industry standards such as NFPA guidelines for safe boiler operation.
Check NYC Buildings, fire safety codes, and NFPA guidelines for best practices.
Watch Video
Key Points
- Know NYC-specific requirements and consult licensed professionals for complex checks.
- Prioritize safety devices, venting, and combustion during inspections.
- Document findings and maintain a maintenance log for longevity.
- In case of any CO or gas issues, act immediately and call a pro.