Outdoor Boiler Maintenance Guide: Inspect the Beast Outside
A practical, step-by-step guide to inspecting and maintaining outdoor boilers. Learn safety tips, visual checks, and when to call a pro to handle the boiler beast look outside with confidence.

You will learn a safe, structured approach to inspecting an outdoor boiler, identifying common outdoor issues, and performing essential maintenance. This guide covers safety precautions, visual checks, and when to seek professional help, all framed around the idea of facing the “boiler beast look outside” with a confident plan.
Why the phrase boiler beast look outside matters
The expression boiler beast look outside captures the intimidating, weather-exposed reality of outdoor boilers and the components that live outside a home or building. In many homes, the outdoor boiler or the outdoor cabinet houses pumps, valves, and venting that must endure rain, snow, and temperature swings. A routine check helps you spot rust, leaks, insulation gaps, or obstructed vents before they turn into expensive repairs. According to Boiler Hub analysis, a proactive exterior inspection reduces unexpected outages by clarifying which components need seasonal attention and which areas are most vulnerable to weather-related wear. For homeowners and facility managers, understanding this mindset turns a daunting outdoor system into a manageable maintenance task, aligning with practical boiler maintenance best practices and keeping the system reliable year-round. The keyword boiler beast look outside should be treated as a mnemonic reminder to treat the exterior like a living, breathing part of the heating system. By acknowledging the outdoor elements, you can approach upkeep with a clear checklist and a calm, methodical workflow that protects your investment and safety.
Safety considerations for outdoor boilers
Outdoor boilers introduce additional safety considerations compared to indoor units. Begin by locating the emergency shutoffs and ensuring the area around the unit stays clear of combustibles and flammable materials. Install and maintain an audible carbon monoxide detector near living spaces, and verify that CO alarms on every floor are functional. When you work outside, always wear eye protection and gloves, and avoid working in wet conditions which can increase the risk of slips and electric shock. If you smell gas, hear hissing sounds, or notice a hissing near the vent, leave the area immediately and call the utility company or a licensed professional. Boiler Hub emphasizes safety as the foundation of any maintenance routine, and a cautious approach reduces risk for you and your family.
Visual inspection checklist for the exterior unit
A thorough exterior check is the first line of defense against outdoor boiler problems. Use this quick visual checklist:
- Inspect the cabinet for rust, corrosion, dents, or loose panels.
- Check weather seals around doors and access points; replace gaskets if cracked.
- Ensure venting is clear of debris, snow, and vegetation; verify that the exhaust path is unobstructed.
- Look at condensate drains and any splash hazards; confirm they aren’t blocked.
- Examine exposed piping insulation for tears or missing sections; rewrap if needed.
- Confirm at least the minimum clearance around the unit (no shrubs or combustible materials within a safe distance).
- Take note of any unusual noises, sudden temperature changes, or damp spots on the ground near the unit. Keeping a simple exterior photo log can help track changes over time and support professional troubleshooting. The exterior view tells you a lot about the condition of the boiler beast look outside and sets up more detailed inside checks if needed.
Diagnosing common outdoor boiler issues
Outdoor boilers present a mix of weather-driven and system-driven problems. Common signs and how to respond include:
- No heat or weak heat: verify that the power and gas supply are on, check the thermostat settings, and ensure there are no tripped breakers or fuel blockages.
- Leaks or damp spots: locate the source, whether from joints, valves, or the tank, and seal or replace faulty components. Do not ignore even small leaks, as they can worsen quickly in freezing conditions.
- Rust, corrosion, or flaking metal: surface rust may be cosmetic, but advancing corrosion can compromise safety; treat with rust-inhibiting products and plan for replacement if structural.
- Odd noises or banging: thermal expansion, loose components, or air in the lines can cause noise; addressing loose parts or purging air may help, but persistent noises warrant a professional check.
- Inconsistent temperature or pressure readings: verify pressure settings with a manometer and inspect for valve drifts or sediment buildup that affects the system balance. Document any symptoms with photos and notes to help a pro diagnose efficiently. Boiler Hub recommendations emphasize a structured diagnostic approach to prevent minor issues from becoming major faults.
Maintenance tasks you can perform outdoors
Regular outdoor maintenance preserves efficiency and safety. Tasks you can perform with basic tools include:
- Clean the exterior housing and fan guards with a leaf blower or soft brush to remove dirt and debris that can impede airflow.
- Inspect and replace weatherproof seals and gaskets around access doors to prevent moisture ingress.
- Check insulation on exposed pipes and vents; replace torn insulation to minimize heat loss in cold weather.
- Test the exterior vent termination for proper direction and clearance; ensure there’s no backdraft from nearby structures.
- Keep a simple maintenance log with dates, observations, and actions taken. This provides a reference for seasonal adjustments and helps technicians quickly understand the boiler’s outdoor condition. Important reminders: never perform fuel-related tasks without proper qualifications, and never bypass safety devices. The goal is to preserve safe operation and extend component life while minimizing risk to occupants.
When to call a professional and what to expect
There are clear signs when a pro is needed. If you notice persistent leaks, strong gas odors, coal-black or burnt-looking flame colors, or frequent pilot/ignition failures, contact a licensed boiler technician promptly. A professional will perform a pressure and combustion analysis, verify venting integrity, inspect the heat exchanger for cracks, check for CO intrusion risks, and confirm overall system safety. Prepare a concise summary of symptoms, a recent service history if available, and any photos you’ve captured. Boiler Hub’s guidance is to escalate when visual inspection and basic checks do not resolve the issue, since outdoor systems are more exposed to weather and can involve hazardous energy sources.
Best practices for winter preparation and year-round care
Winter is a critical period for outdoor boilers. Plan ahead by scheduling an annual professional inspection, ensuring antifreeze levels (if applicable) are correct, and verifying frost protection for all exposed components. In shoulder seasons, perform lighter checks: clean, secure, and re-insulate where necessary. Maintain an ongoing log of readings (pressure, temperature, and fuel usage) to spot trends early. For best results, align your routine with local climate factors and manufacturer recommendations. Boiler Hub recommends a proactive calendar approach to maximize efficiency and minimize costly emergency repairs.
Tools & Materials
- Flashlight (LED)(Prefer headlamp for hands-free work)
- Insulated gloves(Heat-resistant if accessing hot surfaces)
- Safety glasses(Protect eyes from debris and splashes)
- Non-contact voltage tester(Check electrical circuits safely)
- Digital multimeter(For electrical checks and readings)
- Pressure gauge or manometer(If testing system pressure is needed)
- Wire brush / nylon scrubber(Remove surface grime from metal)
- Rust-inhibiting primer and paint(For minor touch-ups on exterior metal)
- Fiberglass or foil insulation wrap(Repair torn insulation on pipes)
- Coolant-safe cleaner(Used only on exterior surfaces; avoid chemical residue near venting)
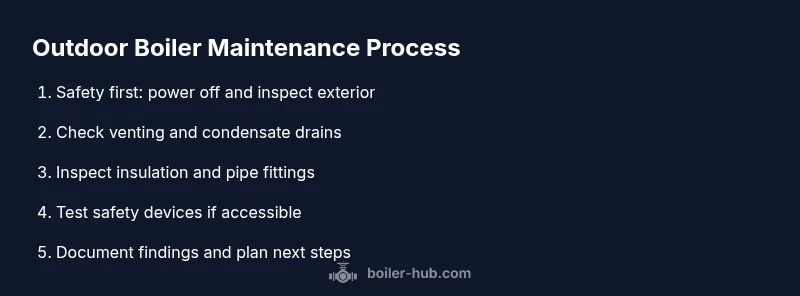
Steps
Estimated time: 60-90 minutes
- 1
Shut off power and fuel supply
For safety, cut electrical power at the disconnect or breaker and close the fuel valve if you’re dealing with gas or oil-fired equipment. This prevents accidental ignition and protects your hands while you inspect. Confirm the unit has cooled before touching any components; if you smell gas, evacuate and contact the utility immediately.
Tip: Verify the power is off using a non-contact tester before touching any wiring. - 2
Inspect exterior cabinet and housing
Visually inspect the cabinet for rust, dents, or loose panels. Check seals around doors and hatches; replace worn gaskets to keep moisture out. Look for any signs of moisture intrusion on the interior side of the door and wipe clean; moisture can promote rust and electrical issues.
Tip: Take photos of any corrosion or damaged seals for your service visit. - 3
Check venting and condensate drainage
Ensure the exhaust vent is unobstructed and that condensate drains aren’t blocked by debris or ice. Clear any buildup that could cause backpressure or moisture backup. Verify that the vent terminates above grade and away from openings to prevent recirculation of exhaust gas.
Tip: Never put hands into the vent or duct while the system is powered. - 4
Inspect piping insulation and connections
Look for torn insulation on supply and return lines. Replace or rewrap damaged sections to minimize heat loss and protect against frost. Check for loose or corroded pipe fittings and tighten or replace as needed.
Tip: Use approved heat-resistant tape or wrap when resealing insulation. - 5
Test safety devices and pressure (if accessible)
If you can safely access the pressure relief valve and temperature controls, perform a cautious test according to the manufacturer’s guidelines. Do not hold or manually reset a stuck valve; improper handling can cause injury. Record readings and watch for abnormal values during test.
Tip: If any valve leaks or sticks, do not operate the system; call a pro. - 6
Check for leaks, corrosion, and moisture
A thorough leak check around joints, valves, and seals is essential. Look for water staining on concrete, rusty patches, or damp odors that signal leaks. If you see active leaks, isolate and treat them with approved sealants or replace leaking parts.
Tip: Promptly addressing leaks prevents water damage and fuel inefficiency. - 7
Document findings and plan maintenance
Summarize what you found with dates and photos, and draft a maintenance plan for the season. Schedule professional service if issues exceed your comfort level or require specialized tools. Keeping a log helps identify recurring problems and supports informed decisions.
Tip: Set reminders for seasonal inspections and follow manufacturer guidelines.
Questions & Answers
Is it safe to inspect an outdoor boiler by myself?
A careful exterior inspection can be done by a homeowner, but avoid opening gas lines, the combustion chamber, or venting while the system is pressurized. If you smell gas or detect a CO alarm, evacuate and call professionals. Always shut power and fuel when performing checks.
Yes, you can do a safe exterior check, but never tamper with gas lines or hot components. If in doubt, call a professional.
What does the phrase boiler beast look outside imply for homeowners?
It’s a mnemonic for acknowledging the rugged, weather-exposed nature of outdoor boilers and the potential issues that come with outdoor installations. Treat the exterior like a component that needs regular care—not a decorative box.
It’s a reminder that outdoor boilers demand extra attention and care.
How often should outdoor boilers be serviced?
Outdoor boilers typically benefit from an annual professional inspection, with a lighter exterior check by the owner midway through the heating season. Frequency may vary with climate and usage, but a yearly service helps maintain safety and efficiency.
Aim for a yearly professional check, plus a mid-season exterior review.
Can I insulate outdoor boiler pipes myself?
Yes, you can replace torn insulation with approved pipe wrap or foam insulation. Ensure any sealants are suitable for outdoor use and avoid obstructing vents or access panels. When in doubt, hire a professional for proper installation.
DIY insulation is possible, but use proper materials and avoid blocking vents.
What are signs an outdoor boiler needs replacement?
Persistent leaks, widespread corrosion, frequent ignition problems, or rising fuel use with diminishing heat output are indicators that replacement may be more cost-effective than repair. Have a qualified tech assess the overall condition before deciding.
Look for frequent leaks, corrosion, or poor efficiency that can’t be fixed affordably.
Should I shut off the boiler in winter if I’m away?
If you’ll be away for an extended period in freezing conditions, consider shutting off the boiler and draining the system as advised by the manufacturer. Ensure CO detectors remain powered and functional and arrange a trusted neighbor or service to perform periodic checks.
If leaving for a long period in cold weather, follow manufacturer guidance and keep detectors active.
Watch Video
Key Points
- Inspect exterior and venting before cold weather.
- Safety first: shut off power and fuel before touching components.
- Address signs of leaks or corrosion promptly.
- Maintain a yearly maintenance log for the outdoor boiler.