1 2 boiler drain valve: DIY install guide for homeowners
Step-by-step guide to installing or replacing a 1 2 boiler drain valve, with safety checks, tools, and maintenance tips for homeowners and facility managers.

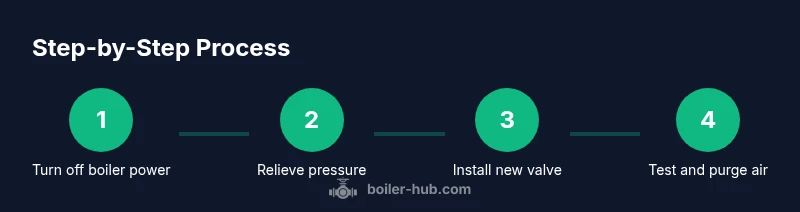
According to Boiler Hub, you can install or replace a 1 2 boiler drain valve safely by following a clear, step-by-step process. Start by shutting off power and isolating the boiler, then relieve pressure, remove the old valve, fit the new one with proper sealant, reconnect the drain, and test for leaks. This approach minimizes leaks and speeds future maintenance.
Understanding the 1 2 boiler drain valve
The 1 2 boiler drain valve is a half inch valve used to drain boiler water for maintenance. The phrase 1 2 boiler drain valve is commonly seen on residential schematics and replacement parts. Brass or bronze bodies with male NPT threads are typical, and the valve must seal tightly to avoid slow leaks. Correct sizing matters: a valve that is too small slows drainage; too large can complicate control. In most homes the drain valve sits at the boiler's low point or at a nearby drain port.
Safety and prerequisites before you begin
Safety comes first. Before touching the boiler, shut off electrical power at the breaker and, if applicable, close the gas valve. Relieve residual pressure by opening the drain a small amount only after depressurizing. Wear eye protection and gloves, keep the area dry, and have a bucket and towels at hand. Boiler Hub emphasizes that safe procedures reduce injuries and water damage.
Tools, materials, and prep you’ll need
Being prepared makes the job smoother. You’ll typically need a 1/2 inch boiler drain valve, an adjustable wrench, PTFE tape, rags or a bucket, safety gear, and optional gaskets. Check that the valve matches the pipe size and thread type before you start. Laying out tools ahead reduces trips to the workshop and speeds completion.
Common installation scenarios and approaches
You may be replacing an old valve or adding a drain valve to a new boiler. If replacing, inspect threads and seating areas for corrosion and replace washers as needed. For new installs, verify an accessible drain path and ensure drainage will occur away from electrical components. Local codes may specify how the valve is vented or plumbed; follow them closely.
Post-installation testing and startup checks
After installation, re-pressurize slowly and watch for leaks at threads and the body. Open the drain briefly to ensure flow; then close and monitor for drips for 15-30 minutes. If leaks appear, tighten in small increments and reseal as needed. A successful test means the boiler can be drained safely for maintenance.
Tools & Materials
- 1/2 inch boiler drain valve (brass or bronze, NPT)(Ensure valve matches pipe size and thread type)
- Adjustable wrench(Fit around hex nut; avoid overtightening)
- PTFE tape or pipe thread sealant(Wrap 3-4 turns clockwise on male threads)
- Rags or shallow bucket(Catch water and protect floor)
- Safety goggles and gloves(Protect eyes and hands)
- Flashlight or headlamp(For dim boiler closets)
- Replacement gaskets or washers(If applicable, check compatibility)
- Pipe cutter or hacksaw(Only if pipe trimming is needed)
Steps
Estimated time: 30-45 minutes
- 1
Power down and isolate
Turn off the boiler power at the switch or breaker and close any isolation valves. If used, shut off the gas supply. Allow the unit to cool and start depressurizing by opening the drain slightly, then prepare to drain into a bucket.
Tip: Verify the circuit is dead with a tester before touching wires. - 2
Relieve pressure and drain
Place a bucket under the drain and gently open the existing valve to vent pressure. Let the water drain until the line is near depressurized, then close to minimize splashing. Have rags ready to catch residual droplets.
Tip: Do not remove the valve completely while pressure remains. - 3
Remove old valve
Hold the pipe steady with one wrench while loosening the valve nut with another. Remove the old valve and inspect threads and seating area for corrosion or damage. If stuck, apply penetrating oil and wait a few minutes before retrying.
Tip: If threads are damaged, replace the nipple or entire valve assembly. - 4
Prepare the new valve and apply sealant
Wrap 3-4 turns of PTFE tape on the male threads in the direction of tightening. Hand-tighten the new valve, then snug with a wrench—avoid over-tightening that could strip threads.
Tip: Follow manufacturer torque recommendations if provided. - 5
Install valve and reconnect drain line
Thread the new valve into place and connect the drain line. Ensure the drain nipple points downward to promote complete drainage. Check seating and tighten evenly to prevent leaks.
Tip: Use thread sealant only if recommended by the valve manufacturer. - 6
Test and purge air
Restore power and slowly open the drain to flush air from the line. Observe for leaks around the body and threads, then close and refill the boiler. Recheck after stabilization for any drips.
Tip: If leaks are present, tighten in small increments and reseal as needed.
Questions & Answers
What is a 1 2 boiler drain valve and why is it important?
A 1 2 boiler drain valve is a half inch valve that allows controlled draining of boiler water for maintenance. It helps you flush, drain, and service the boiler without draining the entire system.
A half-inch boiler drain valve lets you drain water from your boiler for maintenance without emptying the whole system.
Can I install a 1/2 boiler drain valve myself, or should I hire a plumber?
If you are comfortable with basic plumbing tasks, depressurizing a boiler, and using wrenches safely, you can replace a 1/2 boiler drain valve. If you’re unsure about any step or the boiler is under warranty, consider hiring a professional.
It’s doable for a handy homeowner, but consult a pro if you’re unsure.
What safety steps should I take before starting?
Shut off power (electric or gas) to the boiler, close isolation valves if present, and relieve pressure. Wear eye protection and gloves, and keep the workspace dry.
Turn off power and relieve pressure; wear protection before you start.
How can I tell if the valve is leaking after installation?
Watch for drips, dampness, or a steady hiss around the valve. After refilling, leave the system pressurized for 15-30 minutes and recheck.
Look for drips around the threads and fittings after the system is back under pressure.
What maintenance does a boiler drain valve require?
Inspect for corrosion, ensure tightness, replace gaskets if needed, and keep the drain path clear for reliable operation.
Check it periodically for leaks or corrosion and reseal as needed.
Watch Video
Key Points
- Turn off power and depressurize before work.
- Use PTFE tape and proper torque to seal threads.
- Test for leaks after re-pressurizing the boiler.
- Ensure drain points downward and is accessible.
- Document maintenance for future service.