Navien Combi Boiler Installation: Step-by-Step Guide
A comprehensive guide to planning, venting, piping, and commissioning a Navien combi boiler installation. Learn safety checks, code compliance, and best practices for a reliable, efficient system.

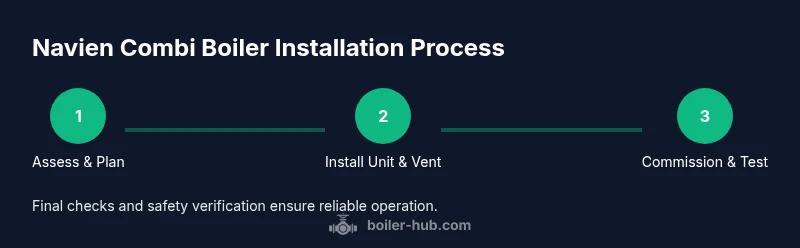
This article guides you through planning, safety checks, and a step-by-step installation of a Navien combi boiler, including venting routes, gas supply, electrical connections, and return/flow piping for domestic hot water and heating. You will see required clearances, material selection, and commissioning steps to ensure a safe, code-compliant install with long-term reliability.
What is a Navien Combi Boiler and Why It Works for Small Homes
Navien combi boilers are compact, high-efficiency units that deliver both space heating and domestic hot water on demand. They are designed to install in tight mechanical closets or utility rooms where space is limited, which makes them popular for condos, townhomes, and small houses. A navien combi boiler installation benefits from the unit's integrated controls and condensating efficiency. According to Boiler Hub, these features translate to easier service and potential long-term energy savings. For a navien combi boiler installation, selecting the correct model and planning venting are critical.
In practice, a Navien combi boiler combines two systems into one: a primary heat circuit that serves baseboard or radiant zones and a domestic hot-water loop that heats water on demand. This means fewer bulky tanks and simpler piping runs, but it also means precise sizing is essential. If the unit is too large, you pay for unused capacity; if too small, you will experience lagging hot water or weak heating in cold weather. When selecting a model, homeowners should consider peak hot-water demand, the number of bathrooms, and the distance to farthest fixtures. A correctly chosen Navien model will maintain stable temperatures and quick hot-water delivery, even during simultaneous heating and shower use. This navien combi boiler installation approach supports efficient, reliable performance when correctly planned.
For a navien combi boiler installation, you will benefit from following manufacturer guidelines and local code requirements to ensure long-term reliability and safety.
Planning, Permits, and Code Considerations
Before you mount the Navien combi boiler, map out the installation space and confirm it meets local building and gas codes. Most jurisdictions require a permit for replacing a gas appliance and for any venting work. Check with your city or county building department to determine whether inspections are needed and which fuel-type requirements apply. Navien's installation manual and local codes will guide venting materials, distance from combustible surfaces, clearance around the unit, and combustion air requirements. Boiler Hub's analysis emphasizes that following manufacturer guidelines reduces call-backs and improves safety.
Evaluate the space for service access, drainage, and combustion-air supply. The area should be free of dust, solvents, and flammable materials, with a flat, stable base for the boiler. Plan vent termination carefully: most Navien models use concentric or sidewall vents; ensure the chosen route exits above-grade and away from doors, windows, and fresh-air intakes. Confirm electrical service is appropriate—many Navien units require a dedicated circuit and a dedicated thermostat or control module. Finally, consider whether you will perform the work yourself (on a limited scope) or hire a licensed professional for gas, venting, and controls.
System Design Choices: Sizing, Venting, and Piping
Sizing a Navien combi boiler correctly is crucial for comfort and efficiency. Use the manufacturer’s boiler-sizing charts, your climate zone, insulation, and your hot-water draw pattern to pick a unit that can meet peak demand without excessive cycling. Oversizing wastes energy, while undersizing can leave you cold or without hot water during showers. In addition to input rating, pay attention to venting options. Navien supports multiple venting configurations, including concentric vent kits and, in some models, sidewall venting. Each option has rules about vent length, number of elbows, and clearance from openings; the installation manual provides model-specific constraints. The piping layout should minimize pipe runs and ensure proper air elimination and purge points.
Plumb the boiler into the cold-water inlet, the domestic hot-water outlet, the heating circuit, and the condensate line. Use appropriate materials (copper or PEX) with proper fittings, isolation valves, and backflow protection where required. Install a pressure-relief valve and ensure the system pressure setpoint aligns with the Navien specification. Finally, check electrical connections: many Navien units require a 120V supply and a control signal with a compatible thermostat or zone controller. Keeping the line-sets short, well-supported, and properly insulated helps prevent heat loss and energy waste.
Venting, Gas Supply, and Electrical Connections Overview
Venting is one of the most critical safety aspects of Navien combi boiler installation. Follow the approved vent type for your model and use the manufacturer’s vent kit with the correct sealants and gaskets. The vent run must maintain the minimum slope and allow for condensate drainage back to the boiler trap. Gas supply must be sized to the unit's input rating; use an approved gas shut-off valve and meter pressure within spec. A licensed gas technician should complete all gas piping work and perform a leak test.
Electrical work includes providing a dedicated circuit with proper disconnect, a grounded receptacle as required, and integration with the house controls. Never share a circuit with other high-draw appliances. The Navien unit’s control module may require a 24V signal from a zone controller or thermostat. After connections, verify polarity, grounding, and proper operation of the boiler’s safety interlocks. Safety devices such as CO detectors and flame safeguards must be installed and tested according to code.
Domestic Water and Heating Circuit Connections
Connecting the Navien combi boiler to domestic hot water and space heating circuits requires careful attention to flow, temperature, and mixing. Install a dedicated domestic water line with an approved check valve and anti-scald device if the local code requires. Connect the boiler’s hot-water outlet to the home’s hot-water distribution, ensuring the return line has a vented air elimination loop if needed. For heating, tie the boiler into the primary loop and ensure zone valves or pumps are sized to match the boiler’s output. Use properly rated circulators, bleed valves, and purge stations to remove air from the system, which can otherwise cause noise and reduced efficiency.
Also plan for expansion and pressure management. An expansion tank sized for your system volume helps absorb thermal expansion. Make sure to set the boiler’s pressure to the manufacturer’s target (often around 12-20 psi in a residential system) and verify that the domestic hot-water temperature remains within comfortable ranges. Finally, install and test trap or condensate lines to ensure proper drainage and prevent leaks into living spaces.
Commissioning, Testing, and Safety Checks
Once all connections are complete, fill and purge the system to remove air pockets. Start with the heating circuit and then test the domestic hot-water output at multiple outlets. Check for gas leaks with a soapy water solution and perform a CO detector test. Confirm that the condensate line drains correctly and that the venting system remains airtight. Program the thermostat or zone controls and set hot-water temperatures to safe, comfortable levels.
Pressure testing is critical. Use the Navien manual’s recommended procedures to conduct a leak test under pressure; monitor for any drop in pressure over a 24-hour period. Run the boiler through a complete heating cycle to verify ignition, flame stability, and modulation. Confirm that the unit communicates with the control system and that fault codes are cleared. Finally, provide the homeowner with a brief operating manual and schedule a follow-up inspection to ensure long-term reliability.
Common Pitfalls and Maintenance Considerations
Common mistakes include skipping proper venting or using non-approved vent components, not sizing the unit correctly, or neglecting air elimination and purge points. Another frequent issue is inadequate gas supply or improper gas-pressure testing, which can cause unreliable ignition or poor operation. Regular maintenance is essential: schedule annual professional inspections, flush the system to remove mineral buildup, and test the CO detectors and flame sensor. Keep the area around the boiler clean and accessible, and document any service work to support warranty compliance. If you plan to move or remodel in the future, consider how vent routing or air supply could be affected and adjust accordingly. Additionally, ensure the expansion tank remains properly charged, verify that the pressure relief valve is functional, and inspect piping supports.
Tools & Materials
- Vent kit compatible with Navien model(Check model compatibility and follow installation manual.)
- Gas supply line with shut-off valve(Piped by licensed gas technician; ensure adequate capacity.)
- Condensate drainage components(Trap, drain, and discharge to suitable area.)
- Water piping (copper/PEX) and fittings(Include isolation valves and purge points.)
- Electrical supply (dedicated circuit, 120V)(Include proper disconnect and grounding.)
- Mounting hardware and brackets(Securely mount unit with appropriate clearances.)
- Tools: wrenches, Teflon tape, pipe dope(Have adjustable wrenches and pipe prep on hand.)
- CO and gas detectors(Install per code and test after commissioning.)
- Backflow prevention/anti-scald devices(Use where required by local codes.)
Steps
Estimated time: 4-8 hours
- 1
Verify compatibility and design layout
Review Navien model specifications, available venting options, and your space layout. Confirm capacity and clearances meet code before procurement.
Tip: Cross-check model data plate with room dimensions to avoid future rework. - 2
Shut off utilities and prep work area
Turn off gas, electricity, and water as required. Clear the workspace, install working lights, and place drip trays to catch any spills.
Tip: Label shut-offs and keep a clear path to the installation area. - 3
Install mounting bracket and position unit
Secure the mounting bracket to a stud wall or solid surface and align the Navien unit. Ensure level placement for proper venting and connections.
Tip: Use a spirit level and measure clearance to combustible materials. - 4
Run venting route and install termination
Install the chosen vent configuration (concentric or sidewall) per Navien’s instructions. Seal joints and verify slope for condensate drainage.
Tip: Avoid sharp bends; limit elbows to reduce pressure loss. - 5
Connect gas supply and verify shutoff is accessible
Have a licensed technician connect the gas line and install an accessible shut-off valve. Perform a leak test after connections.
Tip: Always double-check gas pressure with the proper gauge. - 6
Connect water and heating circuits, install isolation valves
Tie in cold-water, hot-water, and heating circuits. Add isolation valves and purge points to facilitate future service.
Tip: Purge air from the system at purge stations during commissioning. - 7
Fill, bleed, purge, and test for leaks
Fill the system, bleed all air from radiators and the DHW loop, and apply soapy water to joints to check for leaks.
Tip: Do a thorough leak check around every joint and valve. - 8
Power up and perform commissioning and controls setup
Power the unit, verify ignition, check flame stability, and configure thermostat/zone controls. Document settings for the homeowner.
Tip: Record any fault codes and plan a follow-up inspection within a week.
Questions & Answers
Do I need a permit for Navien combi boiler installation?
Yes, most areas require a permit for installing or replacing gas appliances and for venting work. Check with your local building department.
Yes, permits are generally required for gas boiler installation and venting work.
Can a homeowner install a Navien combi boiler themselves?
Gas appliances typically require a licensed professional per local codes. Some non-structural tasks may be DIY with care, but verify local rules.
Gas work usually needs a licensed professional. Check local rules first.
What venting options are compatible with Navien combi boilers?
Navien models support concentric and sometimes sidewall venting. Use the model-specific vent kit and follow the installation manual.
Use the venting type specified in the Navien manual.
What maintenance steps are recommended after installation?
Schedule annual professional inspections, flush mineral buildup, test CO detectors, and verify flame sensor operation.
Annual service is recommended.
How long does a Navien combi boiler installation typically take?
Time varies with existing ductwork and venting; expect several hours to a full day depending on complexity.
It usually takes several hours to a day.
What are common mistakes during Navien combi boiler installation?
Vent-ing errors, improper gas sizing, skipped purge points, and neglecting air elimination are frequent issues.
Common mistakes include venting errors and improper gas connections.
Watch Video
Key Points
- Plan permits and layout before starting
- Size, vent, and piping must follow Navien specs
- Use a dedicated gas and electrical supply per code
- Thorough purge and leak testing prevent failures
- Schedule annual professional maintenance for longevity