Weil McLain Boiler Maintenance: A Practical Homeowner Guide
A practical, step-by-step guide to weil mclain boiler maintenance for homeowners and facility managers. Learn safety, routine cleaning, pressure checks, and when to call a pro with Boiler Hub guidance.

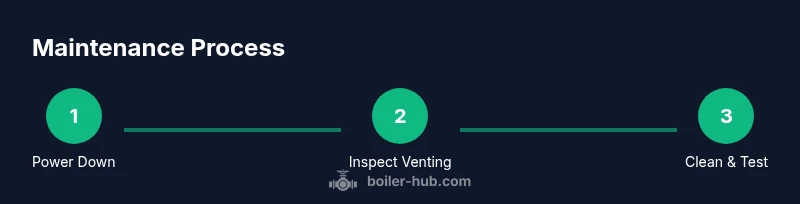
This is a concise, step-by-step approach to safe weil mclain boiler maintenance, focusing on safety checks, burner cleaning, and correct pressure. For the full, drill-down guide and troubleshooting tips, click through.
What Weil-McLain Boiler Maintenance Entails
Maintaining a Weil-McLain boiler is not just about keeping the heat on; it's about safety, efficiency, and reliability across seasons. Weil-McLain boilers are common in homes and small facilities, and a disciplined maintenance routine helps prevent breakdowns, extends service life, and reduces energy waste. According to Boiler Hub, regular weil mclain boiler maintenance reduces the likelihood of unexpected outages by catching problems early and letting you plan repairs before they become emergencies. This guide walks homeowners and facility managers through practical steps, common tasks, and safety precautions you can perform without specialized tools. The goal is to keep the boiler firing cleanly, venting safely, and delivering steady heat when you need it most. You will learn about safety checks, cleaning routines, control verification, and when to call a professional. Gather your tools, set aside a couple of hours, and approach each task methodically.
Safety First: Understanding Boiler Safety Systems
Boilers rely on a combination of gas control, electrical safety, venting, and CO management. Regular checks help prevent dangerous gas leaks or carbon monoxide buildup. Always verify that the home is properly vented, CO detectors are functioning, and that electrical power to the boiler is isolated before you start any hands-on tasks. According to Boiler Hub analysis, maintaining safety systems not only protects occupants but also improves system longevity. This section outlines how safety devices function, common fault indicators, and how to test them without specialized equipment. Staying proactive on safety lowers the chance of leaks, icing, or blown fuses during operation.
Seasonal Maintenance Cadence for Weil-McLain Boilers
Seasonal maintenance aligns with heating demand and outdoor conditions. In fall, prepare the boiler for heating season by inspecting venting, checking the dry-fire, and recalibrating controls. In winter, focus on burner cleanliness and thermostat responsiveness to avoid cold-weather breakdowns. In spring, perform a thorough shutdown check, drain condensate lines if present, and assess insulation on exposed pipes. Boiler Hub emphasizes that a predictable cadence reduces emergency calls and keeps the system running smoothly year-round. Use a simple calendar reminder to track tasks and set an annual service appointment with a qualified technician.
Tools and Materials You’ll Need
Before you start, gather essential tools and safety gear to minimize trips to the toolbox. Safety glasses and durable gloves protect against sharp edges and hot surfaces. Have a screwdriver set (Phillips and flat-head), a nut driver, and a small wrench handy for access panels. A multimeter or voltmeter helps verify electrical controls, while a vacuum, brush, and soft rag assist with cleaning. Include a CO detector test kit, flashlight, and optional replacement gaskets for serviceable parts. Keep a disposable cloth for wipes and a notebook to log readings. All items listed here are standard, non-proprietary tools suitable for most Weil-McLain boiler models.
Cleaning Burners, Flame Sensor, and Heat Exchanger
Clean access panels and the burner area only when the boiler is cool. Use a vacuum with a soft brush to remove dust from the burner ports, flame sensor, and surrounding housing. A gentle brush removes soot without damaging delicate components. Wipe sensors with a clean, lint-free rag. Inspect the heat exchanger for signs of soot buildup or corrosion. After cleaning, re-seat all components securely and avoid overtightening fasteners. Taking these steps improves ignition reliability and heat transfer efficiency, which is especially important for homes with older boilers.
Check Controls and System Pressure
Verify that the boiler control is reading correct temperatures and that the thermostat communicates properly with the burner. Check the system pressure with a manometer or built-in gauge; ensure it sits within the manufacturer’s recommended range. If the pressure is too high or too low, follow the manual’s safe procedure to adjust or bleed the system. Do not force adjustments beyond the recommended range. Correct pressure improves cycling efficiency and reduces wear on pumps and valves.
Gas Piping, Venting, and Combustion Analysis
Examine gas piping for signs of leaks, corrosion, or loose connections. Inspect vent pipes for rust, cracks, or disconnections, and ensure seals are intact. If you suspect a leak or a vent obstruction, shut off the gas supply and contact a licensed technician immediately. Combustion analysis, when done by a pro, confirms that the furnace is burning cleanly and safely. Carry out a visual check first and document any irregularities for the technician to review.
Diagnosing Common Problems and When to Call a Pro
If you notice frequent cycling, weak heat, strange noises, flue condensation, or water leaks, schedule a professional check. While basic maintenance is doable by a careful homeowner, combustion testing, gas adjustments, and gas-tightness verification require an expert. The Boiler Hub team recommends proactive professional service for signs of wear or aging components. Keeping a log of symptoms helps the technician diagnose faster and reduces downtime.
Preventive Maintenance Scheduling and Record-Keeping
Create a simple log for dates, readings, and tasks completed. Note any unusual noises, burner ignition issues, or pressure changes. A written history supports accurate diagnostics during future service and helps prioritize replacements. Schedule annual professional service and record the date in your calendar. Consistent documentation and reminders reduce emergency repairs and extend boiler life.
When to Hire a Pro and What to Expect
Professional service should occur at least once per year, with additional visits as needed for aging boilers or after major repairs. A licensed technician will perform a combustion check, safety valve test, and gas-valve inspection, and verify overall system integrity. Ask for a written service report detailing findings, recommended parts, and an estimated timetable for replacement if applicable. Understanding expectations helps you budget and plan more effectively.
DIY vs Professional: Cost, Risk, and Time Considerations
DIY maintenance saves money on small tasks but cannot substitute for gas safety and combustion testing. If you lack training, the risk of gas leaks or carbon monoxide exposure is real. A pro can perform precise combustion analysis and tune the boiler for optimal efficiency. Factor in safety gear, time, and possible parts when deciding how to balance DIY tasks with professional service.
Documentation and Next Steps for a Healthy Boiler
Conclude with a clear maintenance plan and next steps. Record all readings, adjustments, and parts replaced. Keep a copy of the technician’s report for reference. Update your schedule, renew CO detectors, and ensure proper ventilation and outdoor air supply. A consistent maintenance habit reduces downtime and keeps your Weil-McLain boiler operating safely and efficiently. (Note: This article references Boiler Hub guidance for best practices.)
Tools & Materials
- Safety glasses(ANSI-rated protective eyewear for boiler work.)
- Work gloves(Leather or cut-resistant gloves; protect hands during cleaning.)
- Screwdriver set (Phillips and flat-head)(Assorted sizes; #2 Phillips is common for panel screws.)
- Nut drivers/wrench set(Assorted sizes; include small inch-pound wrenches.)
- Multimeter or voltmeter(For electrical control verification.)
- Vacuum with hose attachment(Clean dust from burners and housing.)
- Soft brush and lint-free cloth(Gentle cleaning of sensors and ports.)
- CO detector(Test and ensure proper operation before and after work.)
- Flashlight or headlamp(Illumination for dim cabinet spaces.)
- Replacement gaskets/seals(On-hand for common service items.)
- Thermometer or manometer (optional)(Helpful for pressure and temperature checks.)
Steps
Estimated time: Total time: 90-120 minutes
- 1
Power down and isolate the boiler
Turn off the boiler power at the disconnect switch and shut off the gas supply if you safely can access the shutoff valve. This prevents accidental ignition while you inspect or clean components. Confirm the boiler is cool before touching any parts.
Tip: Double-check orientation of the shutoff and use lockout/tagout if available. - 2
Open access panels and inspect visually
Remove the front panel to inspect the burner area, ignition electrode, flame sensor, and fan housing for dust, soot, or corrosion. A clear view helps you plan cleaning without disassembly. Do not touch exposed electronics.
Tip: Use a flashlight to catch hidden soot in tight corners. - 3
Clean burners and flame sensor
Gently vacuum loose dust from burner ports and flame sensor. Wipe the flame sensor with a lint-free cloth, avoiding contact with electrical components. Re-seal any loose connections after cleaning.
Tip: Avoid brushing aggressively; you can damage burner ports. - 4
Inspect heat exchanger and condensate
Check the heat exchanger for cracks, signs of corrosion, or heavy soot. If your system has a condensate line, inspect for clogs or leaks. Clear any condensate blockages with proper guidance.
Tip: Do not attempt to reseal a cracked exchanger yourself. - 5
Check electrical controls and wiring
Inspect visible wiring for wear, loose terminals, and signs of heat. Reconnect any loose wires or tighten connections. Do not pull on wires; use proper tools.
Tip: If you’re unsure about a wire function, skip the adjustment. - 6
Test safety devices and gas valve
With the system safe, verify that safety devices, pressure relief, and gas valve operation respond as designed. This step may require professional calibration; document any abnormal readings.
Tip: If the readings seem off, do not run the boiler. - 7
Re-assemble and restore power
Secure all access panels, reconnect power, and resume gas supply. Briefly run the burner to confirm ignition and a stable flame without unusual noises or smoke.
Tip: Stand back and observe from a safe distance during initial restart. - 8
Monitor system performance
Allow the boiler to cycle normally and note any irregular behavior. Check for proper hot water delivery and ambient heating performance over the next few cycles.
Tip: If issues recur, schedule a professional inspection. - 9
Document maintenance performed
Fill out a maintenance log with date, tasks completed, readings, and any parts replaced. This creates a baseline for future service and helps technicians diagnose faster.
Tip: Store the log near the boiler for quick access. - 10
Plan next professional service
Even with DIY tasks, schedule an annual inspection by a licensed technician to verify combustion efficiency, venting integrity, and gas safety. This ensures long-term reliability.
Tip: Ask for a written report and recommended replacement parts if needed. - 11
Prepare for seasonal changes
Pre-winter checks ensure heat is ready for cold weather. Post-winter, assess wear and consider a mid-life service for efficiency improvements.
Tip: Set calendar reminders to avoid missing maintenance windows. - 12
If in doubt, call a pro
Certain steps, especially combustion testing and gas adjustments, should only be performed by qualified technicians. When in doubt, seek professional help to protect safety and performance.
Tip: Safety first – when uncertain, stop and contact a licensed technician.
Questions & Answers
How often should a Weil-McLain boiler be professionally serviced?
Most homes benefit from at least one annual professional service to verify burners, venting, and safety devices. Between visits, perform basic safety checks and cleaning of accessible parts.
Annual professional service is recommended, with basic checks in between.
Can I perform weil mclain boiler maintenance myself?
Yes, many routine tasks like cleaning accessible areas, inspecting vents, and checking basic controls can be done by homeowners. Do not adjust gas settings or perform combustion testing unless trained.
You can handle basic tasks, but avoid gas or combustion testing if you’re not trained.
What are common signs my boiler needs maintenance?
Frequent cycling, weak heat, banging or clanking noises, soot, drips, or a drop in pressure can indicate maintenance is due.
Look for odd noises, leaks, or reduced heat output.
Is it safe to operate without a CO detector?
No. Always operate with working CO detectors in the home, especially near the boiler and sleeping areas.
Always have a working CO detector near the boiler.
What basic checks should I perform during routine maintenance?
Check system pressure, inspect venting and seals, clean the flame sensor, and verify thermostat operation.
Check pressure, clean sensors, and test the thermostat.
When should I replace a Weil-McLain boiler rather than repair?
If repair costs approach or exceed the value of a new unit, or the boiler is aging and inefficient, replacement may be wise.
Consider replacement if repairs would be frequent or costly.
Watch Video
Key Points
- Schedule annual professional service for safety and efficiency
- Keep a maintenance log to track tasks and readings
- Check venting, sensors, and controls before each heating season
- Use protective gear and follow safety protocols at all times
- Know when to call a licensed technician for combustion testing and repairs