Boiler Zone Valve Repair: Step-by-Step Guide
Learn to diagnose, test, and safely repair a boiler zone valve. This practical guide from Boiler Hub covers symptoms, tools, step-by-step repairs, safety tips, and maintenance to prevent future issues in residential and commercial boilers.

Goal: diagnose and repair a boiler zone valve safely, restoring reliable zone heating. You’ll learn what a zone valve does, common failure signs, essential tools, and a step-by-step approach to testing, cleaning, or replacing the valve. Safety comes first: disconnect power, isolate gas and water, and call a pro if you’re unsure.
What is a boiler zone valve and why it matters
A boiler zone valve is a motorized valve placed on the piping that feeds each heating zone. It opens and closes in response to a thermostat or building automation, allowing hot water to flow only where heat is needed. When the valve is open, the zone heats; when closed, it conserves energy. A stuck or failed valve can create cold rooms, overheating, or unpredictable boiler cycling. In common hydronic systems, zone valves maximize comfort and efficiency by decoupling zones from a single boiler. According to Boiler Hub, problems typically arise from worn out actuators, stuck blades, mineral buildup, or wiring faults. Regular inspection helps prevent uneven heating and extended boiler run times. By understanding how the valve integrates with the circulator pump and zone thermostats, homeowners and facility managers can better diagnose issues before calling for service.
Boiler Hub Note: With older systems, you may see frequent cycling or zone promises that heat never fully reach some rooms. A failing valve can be a symptom of broader control wiring or pump issues, so you should consider a system-wide check if problems persist across zones.
Signs your zone valve is failing
Common symptoms include a zone that never heats, or zones that heat without a thermostat signal. You may hear a buzzing or hum from the valve motor, or notice a lack of movement when the thermostat calls for heat. Leaks around the valve body or a valve that remains in a half-open position can also indicate wear or mineral buildup. If one zone works but others do not, the issue is often the zone valve or its actuator rather than the boiler itself. Inconsistent or delayed responses from thermostats can also point to faulty wiring or sensor issues. Regular inspection helps identify these signs early and prevent wasted energy and cold rooms.
How zone valves fit into your heating system
Zone valves sit in the piping that distributes heated water from the boiler to designated loops or radiators. They are typically motorized and controlled by thermostats, zone controllers, or a building management system. When a thermostat calls for heat, the valve opens, allowing hot water to flow into that zone. The circulator pump assists in moving water through the system. If multiple zones are in use, the boiler must cycle to meet the combined demand, which can strain older valves. Understanding placement—whether primary/secondary piping, or in a shared manifold—helps in diagnosing where the failure originates. A faulty valve can cause uneven heating, increased energy use, and extra wear on the boiler.
Safety first: hazards and preparation
Working on boilers involves electrical, gas, and pressurized water systems. Before you begin, turn off the boiler and switch off the corresponding power circuit. If you have gas heating, isolate the gas supply to the boiler. relieve system pressure and drain or bypass sections only if you know the procedure and have a container ready for any residual water. Wear protective gloves and eye protection. If the valve is located near exposed wiring or the boiler’s pressure vessel, consider hiring a pro. These steps reduce the risk of shock, burns, and unintended gas release. Always follow local codes and consult the boiler manual for valve-specific instructions.
Testing and diagnosis: where to start
Start by confirming thermostats are calling for heat and that the zone controller is sending a signal to the valve. A multimeter or a voltage tester helps verify that the actuator is receiving the correct control voltage (often 24 VAC in residential systems). If the valve doesn’t respond, test the actuator for continuity and inspect for binding or mineral buildup on the valve stem. Inspect electrical connections for loose wires, corrosion, or damaged insulation. If you detect gas smell, hiss, or an unexplained leak, leave the area immediately and contact emergency services. Don’t operate the boiler until the issue is resolved.
Repair options: cleaning, lubricating, or replacing
In many cases, zone valve issues stem from a stuck valve or a failing actuator. Start with a non-invasive approach: ensure the valve is not physically obstructed, clean mineral buildup from the stem with a soft brush, and test the actuator operation. Lubrication and tightening connections may help if screws are loose. If the actuator won’t respond or the valve remains stuck, replace the actuator or the entire valve. When replacing, match the valve size and the control voltage to the existing system. After any repair, re-pressurize the system slowly and test each zone for proper opening and closing before resuming full heating.
Common mistakes and when to call a pro
Avoid forcing a valve that is stuck; forcing can damage the stem or actuator and worsen leaks. Do not bypass safety controls or run the boiler with the pressure relief valve blocked. Improper wiring can create electrical hazards or void warranties. If you are unsure about electrical checks, gas safety, or complex wiring, call a licensed HVAC technician. When in doubt, a pro can diagnose multiple issues—zone valve, thermostat, circulator, or control board—in a single visit.
Maintenance to prevent future problems
Establish a simple maintenance routine: inspect zone valves annually for smooth operation, test the actuator during the heating season, and replace worn components before they fail. Consider a water treatment or boiler flush schedule to reduce mineral buildup. Keep an eye on wiring terminals and tighten any loose connections. Document maintenance activities so you can track valve age and plan replacements before failure.
A brand-note from Boiler Hub
This guide reflects Boiler Hub’s practical approach to zone valve maintenance. We emphasize safety, testing with proper tools, and proactive replacement of worn actuators or valves. For homeowners and facility managers, a predictable maintenance plan reduces the risk of uneven heating and unexpected boiler downtime.
Tools & Materials
- Screwdriver set (Phillips and flathead)(Phillips #2 and flathead for valve nuts and cover screws)
- Adjustable wrench(For valve nuts and plumbing fittings)
- Voltage tester / multimeter(Test thermostat wiring and actuator voltage (typically 24 VAC))
- Replacement zone valve or actuator(Only if a faulty actuator or valve is confirmed)
- Teflon tape and pipe dope(Seal threaded connections during replacement)
- Soft brush and clean cloth(Clean mineral buildup on valve stem and actuator area)
- Bucket and towels(Contain and absorb any incidental water during draining)
Steps
Estimated time: 60-120 minutes
- 1
Power down and isolate
Turn off the boiler and switch off the electrical circuit feeding the zone valve. If applicable, shut off the boiler’s gas supply first. This prevents shocks and accidental ignition while you inspect the valve.
Tip: Double-check that LEDs or indicators on the control panel are off before touching wires. - 2
Isolate and depressurize
Close the zone’s isolation valve and relieve any pressure in the loop. Have a bucket ready for any residual water. If your system uses a fill valve, reduce pressure gradually to avoid splashing.
Tip: Wear gloves and eye protection; even small pressure releases can be hazardous. - 3
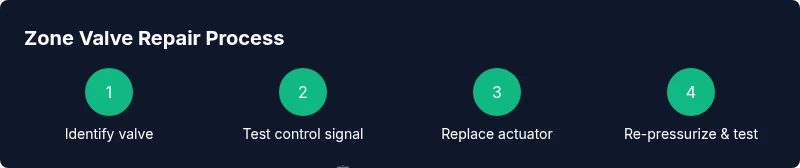
Locate the valve and identify type
Find the motorized valve on the zone supply line or at the manifolds. Note whether it’s a 2-port or 3-port valve and inspect the actuator for signs of wear or damage.
Tip: Document valve model and voltage so you buy the correct replacement parts. - 4
Test valve control signal
With the thermostat calling for heat, verify that the actuator is receiving the correct control signal using a multimeter. If there’s no signal, inspect wiring from the thermostat and control board.
Tip: If you don’t see any signal, focus on wiring or controller issues rather than the valve itself. - 5
Check valve movement
Manually test valve movement if safe to do so. It should move freely with the actuator unplugged after securing power off. Look for binding, corrosion, or stuck components.
Tip: A valve that binds or sticks may indicate mineral buildup or a seized stem. - 6
Decide repair approach
If the actuator tests as faulty, replace just the actuator. If the valve body is corroded or jammed, replace the entire valve. For minor mineral buildup, cleaning may help.
Tip: Seasoned homeowners often find actuator replacement simpler and less invasive than a full valve swap. - 7
Install replacement and reseal
Install the new actuator or valve, apply Teflon tape or pipe dope where needed, and secure connections. Reconnect electrical wiring according to the control scheme, ensuring polarity and voltage are correct.
Tip: Ensure pipes are fully tightened but avoid over-torquing fittings. - 8
Re-pressurize and test zones
Open the supply and refill the loop gradually. Restore power and gas, then run heat across all zones. Check for proper opening/closing and observe for leaks or abnormal noises.
Tip: Test each zone separately to confirm even performance before returning to full operation.
Questions & Answers
What is a boiler zone valve?
A boiler zone valve is a motorized valve that directs hot water to specific zones in a hydronic heating system. It opens and closes in response to thermostats, enabling zone-based heating and energy efficiency.
A zone valve is a motorized valve that sends hot water to the zones that need heat, controlled by thermostats.
Can I repair a zone valve myself?
Basic diagnosis and actuator replacement are doable for homeowners with electrical comfort and basic plumbing skills. If you encounter gas safety concerns or complex wiring, hire a licensed technician.
You can often fix it by replacing the actuator, but call a pro if you’re unsure about gas or wiring.
What are common signs a zone valve needs repair?
Look for zones that don’t heat, odd noises from the valve, the actuator not moving, or leaks around the valve. These indicate potential actuator failure, mineral buildup, or mechanical binding.
If zones aren’t heating or you hear buzzing from the valve, it may need attention.
What maintenance helps prevent valve failures?
Regularly inspect and test valves, flush mineral buildup if needed, and replace aging actuators before failure. Keep wiring clean and connectors tight.
Regular checks and timely replacements keep zone valves reliable.
What should I do if I smell gas while working on the system?
If you smell gas, evacuate the area immediately and call emergency services. Do not operate the boiler or switch electrical components while gas is present.
Leave the area and call for help right away if you smell gas.
Watch Video
Key Points
- Identify zone valve purpose and location before starting.
- Always power down and depressurize safely before any work.
- Actuator replacement is a common fix for failing zone valves.
- Test zones individually after repair to confirm proper operation.
- Maintain a routine to prevent future valve failures.